How to Change a Radiator Valve
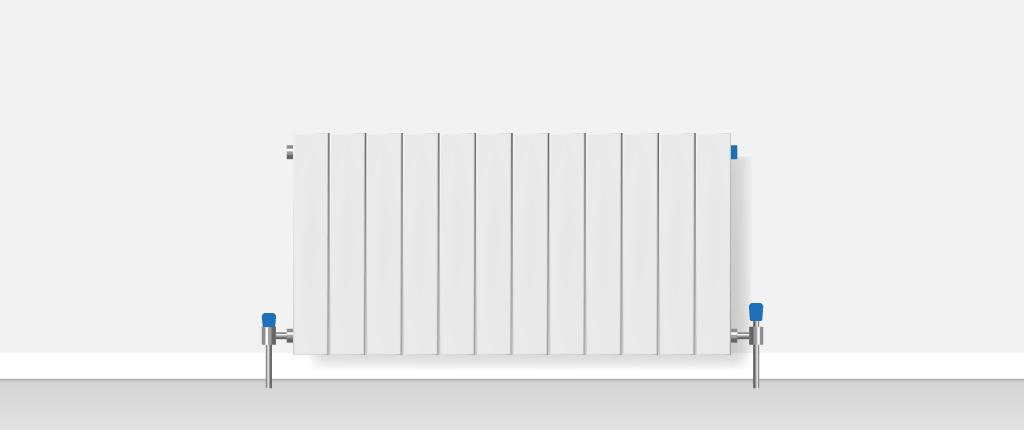
Knowing how to change a radiator valve yourself could save you time and money.
Having said that, it's always best to hire a professional. That way, you can be sure the new valves will be fitted to the highest standard.
Let's go through everything you need to know about changing radiator valves.
What is a radiator valve?
Radiators have three valves: a lockshield valve, bleed valve and control valve.
The control valve is normally either manual or thermostatic. And when replacing radiator valves, these are the ones we're talking about.
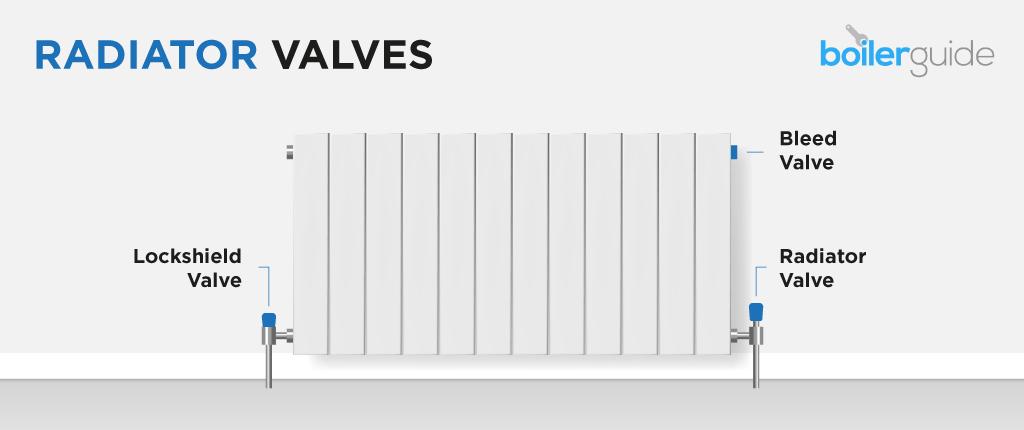
Let's take a look at each valve in a little more detail.
Manual radiator valves
Most radiators have manual radiator valves. They have a range of numbers – normally from 1 to 6 – with 6 being the hottest. By simply turning the valve, you're setting how much hot water can flow into the radiator.
Thermostatic radiator valves (TRVs)
TRVs are a more advanced version of manual radiator valves. They include a small LED display which lets you set a specific temperature for each radiator.
Lockshield valve
The lockshield valve keeps the level of hot water in the radiators around your home balanced. It will prevent hot water flowing to some radiators and direct it to others.
It's unlikely you'll ever have to deal with the lockshield valve.
Bleed valve
Turning the bleed valve allows air in the heating system to escape. Too much air in your radiators can cause blockages which stops the radiators from warming up properly.
Find out more in Radiator Valves Explained.
When should I change the radiator valves?

Radiator valves are normally replaced when they're broken.
A broken radiator valve will not only make it harder to control the temperature of the radiator but could also leak water. So it's a good idea to get this job done quickly.
You may also be looking to upgrade the control valves. Replacing manual valves with thermostatic valves can give you far more control and help to lower your heating bills.
If you're planning to redecorate then your new valves could better suit your colour scheme.
Can I change the radiator valves myself?
Changing a radiator valve can be a DIY job but we strongly advise getting a professional in.
Will the heating system need to be drained?
In most cases the heating system will need to be drained before the valves can be replaced. An experienced professional may be able to replace the valves on certain radiators without fully draining the central heating system.
Get radiator valve sizing right
Radiator valve sizing is the diameter of the connection and pipework. Rather than the height of the valve.
Most radiator valves are designed to be fitted with 15mm pipes as they're the most common. The pipes in your home could be between 8mm and 28mm so be sure to check this before buying new valves.
If they aren't the right size then you can get adapters.
How to change a radiator valve
We can take you through how to change radiator valves in 7 steps. But first there are a few things you'll need to hand:
- Towel
- Bucket
- Cloth
- Hose
- Jointing compound
- Jubilee clip
- Hex key
- Bleed key
- Wrench
- Adjustable spanner
1. Switch off the heating and mains water supply
To start, you need to turn off the heating system and give it time to cool down. About an hour should be enough but you can never be too careful.
You'll also need to:
- Turn off the mains water supply
- Turn down all room thermostats
- Switch off programmers
2. Drain the heating system
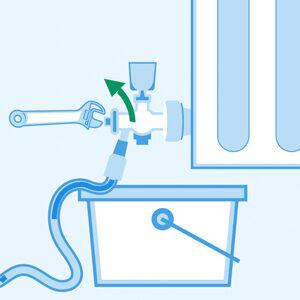
Draining the heating system removes all of the water from the pipes and radiators.
This isn't always necessary but will make changing the radiator valves that bit easier.
If you have a combi boiler then you could drain it yourself. Take a look at our How to Drain a Combi Boiler for help doing this.
While you can drain a combi boiler yourself, hiring a heating engineer is the better option. And if you have a system or regular boiler then it's definitely worth hiring a professional.
3. Take off the old radiator valve
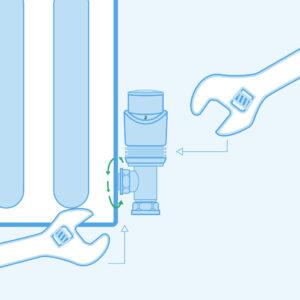
Once the heating system is completely drained – leave it for up to 15 minutes – you're ready to carry on.
Lay a towel under the valve you'll be changing. This will just stop the floor from getting wet if there's a spillage.
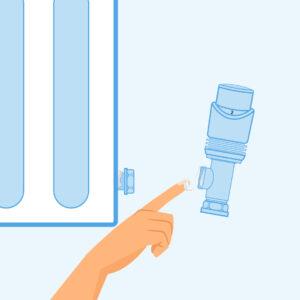
Now it's time to take off the radiator valve.
Grab your wrench and adjustable spanner. We'll be unscrewing the two nuts that connect the valve to the radiator and pipe.
Grip the TRV and start unscrewing the nut that connects it to the radiator. Don't take it all the way off yet. Just loosen it for now.
Then unscrew and remove the nut connecting the TRV to the pipe beneath the radiator. Once that's done, you can remove the nut you loosened earlier.
Now the radiator valve should come off.
4. Give the joints a clean
One the valve is off, give the joints a clean. A little wipe with a cloth should do the job.
Now you want to add a bit of jointing compound to each joint. Jointing compound is a sealand that helps to seal threaded pipes.
5. Fit the new valve
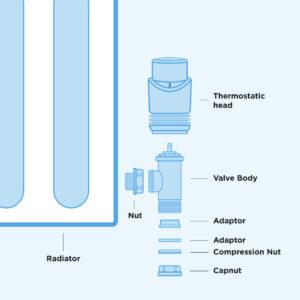
Fit the body of the TRV to the radiator and pipe. Use the wrench to tighten the nuts right up on each side. Now you can simply screw the head of the TRV onto the body.
6. Close the bleed valves
The bleed valves on all of the radiators around your house were opened when you drained the system. Before filling it back up with water, you'll need to make sure they're all closed.
Remember to close the drain valve too.
7. Refill the heating system
Repressurising or refilling the heating system simply means filling it back up with water. And you'll need to do this before you can turn the heating on again.
Refilling the system is something you can do yourself using the filling loop (a metal hose with a valve at either end). If it isn't already connected to the system then you'll need to attach it tightly. Opening the valve(s) will get the water flowing into your boiler.
As the water is flowing, keep a close eye on the pressure gauge. The needle will move up as the water levels in the system rise and you don't want the pressure to be too high.
The manual that came with your boiler will tell you the ideal pressure but in most cases it should be between 1 and 1.5 bar.
8. Bleed the radiators
Bleeding the radiators allows any air trapped in the heating system to make its way out. Too much air in the system can lead to cold radiators as it blocks hot water from making its way around the radiators.
Draining and refilling a heating system is an ideal time for air to get trapped in the heating system. So it's a good idea to bleed the radiators.
Find out how in our guide to Bleeding Radiators.

How to use your new radiator valves
Knowing how to use your new radiator control valves properly could help to keep your heating bills down.
Firstly, if you're changing manual radiator valves then you should upgrade to thermostatic radiator valves.
The great thing about thermostatic radiator valves is they're able to detect the temperature in the room. Manual radiator valves can't do this.
This means the numbers on a thermostatic radiator valve refer to room temperature. Not the temperature of the radiator. An easy mistake to make.
And you'll very rarely need to turn radiator valves to the maximum. If ever.
Turning the valve to the highest setting will keep the radiator on until the room reaches a temperature around 30?. Do this and your heating bills will shoot up.
Fitting thermostatic radiator valves to each radiator around your home will allow you to turn the heating off in rooms where it doesn't need to be on. So you won't be wasting money heating an empty room.
Get a professional to change your radiator valves
The safest and stress-free way to change your radiator valves is by hiring a professional.
By completing our simple online form, you can get free quotes from heating engineers near you. Up to 3 heating companies will be in touch to give you a quote for changing the valves. Once you have your quotes, you can compare them and get your new radiator valves fitted for the best possible price. And, most importantly, fitted by the best person for the job.
Find a local heating engineer


